Manaslu Circuit Trek Difficulty Factors

Last Updated on June 23, 2024 by Treks Planner Nepal

Manaslu Circuit Trek Difficulty Factors. The Manaslu Circuit Trek is a remarkable trek that crosses the unexplored terrain of the isolated Manaslu area. Discover captivating natural landscapes on this amazing trekking adventure. You will remember the experience of traveling through pristine landscapes. It is an amazing trip that traverses the unexplored landscape of the remote Manaslu region. Take in breathtaking views of the outdoors while walking this incredible route. You’ll never forget the feeling of passing through immaculate scenery.

Manaslu Circuit Trek difficulty is often rated as moderately difficult. It makes sense that trekkers would want to know what to expect before starting the trip, though, considering the high-altitude passes, difficult terrain, and unpredictable weather. This post will provide you with a thorough overview of the Manaslu Circuit Trek’s difficulty, including information on the factors that influence it, training and preparation advice, and suggestions for an enjoyable and successful trip.

An Overview of the Trek’s Difficulty Level

The degree of difficulty of the Manaslu Circuit Trek varies according to the fitness level, experience, and amount of preparation of the individual. But generally speaking, the altitude, lengthy trekking days, and perhaps dangerous terrain may make the route difficult.

After 5 to 10 hours of trekking each day on average, the trek can be finished in 14 to 20 days. With its breathtaking views of the surrounding peaks, the ascent and descent of the Larkya La pass is one of the most demanding yet rewarding portions of the trek.

Factors influencing the Manaslu Circuit Trek’s difficult

Altitude sickness/Elevation

One of the challenges in the higher altitude is altitude sickness. The Manaslu Circuit trek travels at a high altitude. Some trekkers may experience altitude sickness when attempting the Manaslu Circuit Trek, which reaches a maximum height of 5,160 meters at the Larkya La Pass. Symptoms of altitude sickness include headache, nausea, vertigo, and dyspnea. Severe instances may result in potentially fatal diseases such as high-altitude cerebral edema (HACE) or high-altitude pulmonary edema (HAPE). Even if you have trekked this trip previously, the trails at elevations of 4000 meters and above are difficult. While trekking, acclimatization, and frequent hydration are crucial. It involves using a variety of strategies to adjust to the shifting circumstances. It is advised that you progressively acclimate to the higher altitudes by taking rest days and progressively rising to higher heights to prevent altitude sickness. Altitude sickness may also be avoided by staying hydrated and consuming lots of water. Above 3000 meters, the atmosphere of the high-altitude region has less oxygen and air pressure. Since alcohol and caffeine are the main causes of dehydration during hiking, it would be beneficial to avoid them.

Distance and Terrain

The Manaslu Circuit Trek has a narrow trail, rocky terrain, and steep ascents and descents that can be difficult to negotiate, particularly in bad weather. Hikers need to be ready for demanding days on the trail, which can last up to eight hours straight. Some hikers may find it nerve-wracking to traverse multiple suspension bridges across steep gorges throughout the walk. To help with balance and stability, hikers should carry trekking poles and wear comfortable, solid hiking shoes. There will be lots of natural trains that traverse through rough terrain, river crossings, and small cliffs. Extreme strength, endurance, and flexibility are requirements for trekkers. It takes great endurance and physical condition to participate in these high-altitude trekking experiences. For this reason, preparing ahead of time with all the necessary exercises is crucial for the Manaslu Circuit Trek.

Temperature and Weather

The Manaslu area experiences erratic weather, with the potential for year-round severe precipitation and snowfall. Consequently, there may be several challenges during the trek due to the Manaslu region’s climate and weather. The weather quickly changes from clear, sunny sky to cloudy, gloomy skies in a matter of hours. Temperatures may fall as low as -8°C during the winter months of December through February, making the hike challenging, particularly at higher altitudes. In the same way, winter snowfall may obstruct or make trails challenging to travel. Because of this, if the weather is too bad, you may have to deal with delays or maybe a trip canceled. The weather presents several additional difficulties. At a higher elevation, the weather will be difficult for you. Regular rains may make paths muddy and treacherous, which makes trekking difficult. In addition, it triggers avalanches, landslides, snowstorms, and other natural disasters. These are the various obstacles and reasons of difficulty that you may encounter while on the high-altitude Manaslu Circuit Trek.

Distance and Duration

The Manaslu Circuit Trek is a long trek that takes several hours to complete to reach the destination. Along the way, you will encounter several obstacles that must be overcome to reach your destination. Approximately 8–12 kilometers are covered on each journey, taking 6–7 hours to complete.

Your trip time will be around two to three weeks since the trek typically lasts between fourteen and twenty-one days. The trek is difficult because of the region’s severe topography and degree of difficulty.

FAQ’S KAILASH MANSAROVAR YATRA

Last Updated on June 18, 2024 by Treks Planner Nepal

FAQ’s Kailash Mansarovar Yatra. Undoubtedly, hundreds of questions will cross your mind as you plan a religious trip to Mt. Kailash. To help you plan your journey confidently and experience the trip of a lifetime, we tried to gather as much information and advice as possible on our Kailash Mansarovar FAQs.

What is the ideal time to travel to the Kailash Mansarovar Yatra?

You can visit Kailash Mansarovar anytime between mid-April and the end of September every year. But without question, April through June and September are the finest times to plan a trip to Mount Kailash since they provide excellent mountain visibility, breathtaking scenery, and pleasant weather. The monsoon months of July and August bring mild rain and fog on occasion. The winter season, which runs from November to March, brings with it significant snowfall and ice, making it almost impossible to traverse some parts of the path.

How difficult is the Kailash Mansarovar Yatra?

The trek is quite challenging and demanding, particularly because of the altitude and the thin, dry air that is 40% less oxygenated than at sea level. Altitude sickness is quite likely to occur under these circumstances. Pilgrims must travel through dangerous, high-altitude regions during the Yatra. The Kailash journey is quite challenging because of the extremely steep hills and the large distances that must be traveled each day between camps. It wouldn’t be an issue if you regularly exercise, have high-altitude trekking expertise, and are in excellent condition.

What is the cost of the Kailash Mansarovar Yatra?

Travel to Tibet is governed by tight regulations for all international visitors. Different fees are charged by the Tibetan government against Indian citizens and foreigners, particularly those who are participating in the Kailash Mansarovar Yatra. The pricing range for Indian citizens is typically between $2000 and $4000, while the price range for non-Indian nationals is between $3000 and $5000. The route you choose, the number of people in the group, the time of year you travel, the kind of transportation you use, the quality of the accommodation and food, and other considerations will all have an impact on the cost of your journey to Kailash Mansarovar.

Who is my guide for the Yatra of Kailash Mansarovar?

All of your guides are native Tibetan and Nepalese people. The Nepalese guides take care of all the pilgrims’ comfort, food, health, and safety needs, while the Tibetan guides handle all the paperwork, communicate in the regional dialect of Tibet, and keep an eye on yak and horse vendors.

What are the available routes to get to Mount Kailash?

There are three main routes to the Kailash Mansarovar Yatra that go from Nepal. Initially, you will take a flight from Kathmandu to Lhasa for the Kailash trip via Lhasa. Following a few days of touring and acclimatization in Lhasa, you will travel via the towns of Shigatse, Gyantse, and Lhatse on your way to Lake Mansarovar. You will then spend a few days performing the Kailash Kora before heading back to Lhasa. Secondly, it is feasible to take an overland trip to Kailash, starting in Kathmandu and driving to Kyirong, the Tibetan border, and then continuing via Saga to Lake Mansarovar and Mount Kailash. Alternatively, you may take a plane from Kathmandu to Nepalgunj, take a helicopter from there to Simikot, and then embark on a rather strenuous climb via Dharapori, Yalbang, and Yari to Hilsa. You will start your journey to Kailash Kora and Mansarovar Lake from Hilsa and go through Purang and Darchen.

How can I go to Mount Kailash the quickest?

The fastest way to go to the sacred Mount Kailash is through Simikot; nevertheless, there are two main problems with this route: flights that are delayed or canceled because of bad weather, and a rapid ascent to a high altitude that might put travelers at risk of mountain sickness. Thus, we highly suggest doing the roughly 10- to 12-day trek overland via the Kyirong route.

What is the most common route to get to Mount Kailash?

The Kyirong route is the most well-traveled route from Nepal to Mount Kailash and Mansarovar Lake. The trip is peaceful and exciting, starting with a drive from Kathmandu to Kyirong, the Tibetan border, and continuing on a beautiful roadway to Kailash Mansarovar.

What kind of fitness is required for Kailash Mansarovar Lake Yatra?

Due to the high elevations of Mt. Kailash and Mansarovar Lake, visitors must be in excellent health and have completed a few weeks of regular exercise before the journey. Before scheduling a journey to Mount Kailash, anybody with any chronic illnesses, including asthma or COPD, must consult with their doctors. For an enjoyable holiday, you’ll need to do some basic yoga, 4 to 5 km of walking each day, lung exercises, and pranayamas like Kapalbati, Bhasrika, and Anulom Vilom.

What kind of toilet facilities are available during Kailash Mansarovar Lake Yatra?

In Taklakot, Saga, and Darchen, new hotels are now being built, and they have rooms with connected bathrooms. While some establishments have Western-style restrooms, the majority of hotels and guesthouses still use the traditional Asian squat toilets, which aren’t often particularly clean. Unless you are using standard hotels, where the restrooms have been upgraded, there is a slight problem in Mansarovar, Dirapuk, and Zutulpuk where you have to cope with temporary restrooms. However, there are no restrooms throughout the Kora, or circumambulation of Mount Kailash, so people must use open-air dug-pit toilets.

What food options are available during the Kailash Mansarovar Lake Yatra?

Since the Mt. Kailash Mansarovar Yatra is primarily a Hindu pilgrimage, almost every meal is vegetarian. You can get Tibetan and Chinese food options at the tea houses. We also recommend you carry dry fruits and nuts, energy bars, etc.

What are the drinking water facilities during the trip?

Since the quality of drinking water in Tibet is unsafe to drink. You can buy mineral water bottles in the tea houses during the yatra.

What type of facilities are accessible for emergency evacuation when traveling?

Given the elevation of Mount Kailash, there is a significant risk that a visitor may have altitude sickness. We have specialized rescuers on the Mt. Kailash Kora path in case an emergency evacuation is required. When the ambulance is within driving distance of the sick passengers, they will transport them there and then return them to the closest hospital or health facility.

What currency should I bring on the Kailash Yatra?

Although it’s possible to exchange US dollars for other currencies in Tibet, the exchange rates might not be as good as they are elsewhere. Therefore, before you leave for your vacation, we advise you to exchange your US dollars for Chinese Renminbi (RMB or CNY) at substantially higher rates in Kathmandu. USD might not be accepted in small teahouses or motels in Tibet, but Chinese cash is readily accepted across the country.

Do I need an insurance for Kailash Yatra?

Crossing the Dolma La Pass at 5,943 meters (19,500 feet) during the Kora is the highest point of the Kailash Mansarovar Yatra. There is a chance that someone at this altitude will get mild to severe altitude sickness. To participate in this trip, you must get enough travel insurance that covers costs associated with any medical emergencies and evacuations. Make sure that your insurance includes emergency air ambulance or helicopter rescue, including medical charges, and that it is fully informed about all the activities you conduct on the trip.

What is the difference between inner Kora and Outer Kora?

With overnight stops at Zutulpuk and Dirapuk, the 56 km (35 mi) outer Kora takes three days to complete. The inner parikrama is considered a unique Kora that is less known to devotees and somewhat more difficult than the outer parikrama, whereas the outer parikrama is the more well-known trek. The Bons walk counter-clockwise and finish the inner Kora in three to five days, whilst the Buddhists do it clockwise. The inner parikrama is an extra trek that leads to Saptarishi Cave and Kailash Nandi in the inner region of Kailash Parbat.

Is there an internet facility available in Kailash Yatra?

Yes, for the majority of the trip, there is decent internet access. Nevertheless, internet access is not available during the Kailash Kora. If you want to use a data connection anywhere in Tibet where your hotels don’t provide it, you may buy a local SIM card there.

Is there electricity available in Kailash Yatra?

Yes, there is electricity available throughout the trip.

Why do people go to Kailash Mansarovar Lake during a full moon?

First of all, a full moon night makes Mt. Kailash appear magnificent. A full moon night holy swim in Lake Mansarovar is said to wash away all sins from the previous 100 lifetimes as well as the current, transforming the individual into a new human soul inhabiting the same body. The most optimistic and lively cosmic forces are radiated by the full moon, according to the old Vedic astrology. To experience the pure spiritual energy that emanates from Kailash and Mansarovar Lake’s natural surroundings, many strive to go to Kailash during full moons.

Is it possible to return without completing parikrama?

If you have altitude sickness or are experiencing serious health problems, you may return without completing your parikrama. At Darchen, though, you will have to wait for the other group members till they finish their Kailash Kora and head back.

Will there be a pandit for puja at Kailash Mansarovar?

Unfortunately, no! There aren’t any pandits or religious gurus around to conduct religious prayers or other customary gifts. One must be hired in Kathmandu, and you must permit him to travel with the rest of the group.

What kind of puja will be done at Kailash?

Every yatri, or visitor, planning to offer prayers is usually aware of the upcoming puja and fire ceremony, or havan, at Mount Kailash. All the supplies needed for the puja will be managed by us from Kathmandu itself, and we will transport everything up. We will set up your puja and other religious ceremonies that you will partake in throughout your journey if you reserve the full moon dates.

Can we take a dip in Kailash Lake?

Hindus believe that drinking the water from Mansarovar and taking a bath there may atone for all of one’s misdeeds from the previous 100 lifetimes as well as from the present. You will see a lot of Indian tourists coming here during the busiest time of year for the Kailash Yatra to take part in the Kailash Parikrama and to bathe ceremoniously in the pure waters of Mansarovar Lake. There is usually a specific location where guests may take a bath; nevertheless, the Tibetan authorities these days forbid taking a dip in the lake.

Is a visa required for the Kailash Yatra?

Kailash Mansarovar is situated inside China’s Tibetan Autonomous Region, all visitors will need a visa. You must have a passport that is valid for at least six months if you intend to go on a pilgrimage journey to the holy Mt. Kailash and Lake Mansarovar. We will handle the visa application procedure and make all the necessary preparations.

What are the documents required for the Kailash Yatra Trip and what not to carry?

For the Kailash Mansarovar Yatra, travelers must have copies of their insurance and a valid passport. Apart from that, no more paperwork is needed. During this journey, make sure you don’t bring any printed materials of any type, including books, periodicals, or documents featuring the Dalai Lama or advocating for “Free Tibet.”

How much do you have to walk on the Kailash Mansarovar Yatra?

Taking the Simikot route via Nepalgunj as an example, you will have a good deal of walking to do from Simikot through Dharapori, Kermi, Yalbang, Tumkot, Yari, and the Tibetan border towns of Hilsa and Purang. This is often not the route for a devout traveler, but rather for an adventurous one. There isn’t much walking if you drive via Kyirong on the overland route or fly to Lhasa and continue driving. The hilly routes of the Kailash Kora mean that even if the walking distance is not great, the walking hours are long. You will be walking for ten to twelve hours on the second day, which is by far the toughest. You must walk for four to five hours on the first day and two to three hours on the third.

What kind of accommodations are available in Tibet and Nepal?

During your time in Nepal, you’ll be accommodated in 3-star hotels featuring in-room facilities and customized services. During the hiking portions of a Simikot trip, you will be accommodated in pretty simple teahouses or, if you choose to camp overnight, tents. You will be lodging in motels with connected bathrooms and Western standards while traveling through Kyirong. You may anticipate a simple shared dormitory while at Mansarovar, Dirapuk, and Zutulpuk.

How to apply for a visa for the Kailash Tour?

To enter Tibet, every foreign visitor must have a current China visa as well as a Tibet travel permit. Travelers from Nepal who wish to visit Tibet should apply for a group tourist visa at the Chinese Embassy in Kathmandu. When you reserve your trip to Kailash Mansarovar with us, we will arrange for your Tibet travel permit and Chinese visa.

Which modes of transportation are used in Tibet and Nepal?

While minibusses are used inside Tibet, 4WD jeep or van will be used for the journey from Kathmandu to the Tibetan border and up to Kyirong. Flying the Simikot route entails taking a twin otter plane to Nepalgunj and then using a helicopter to reach Simikot. You will take a minibus after walking from Simikot to the border with Tibet. Flying from Kathmandu to Lhasa on the route via Lhasa, you will board a Boeing aircraft. You will take a minibus from Lhasa to the destination.a

A Complete Guide to Summit Lobuche Peak

Last Updated on July 9, 2024 by Treks Planner Nepal

A Complete Guide to Summit Lobuche Peak. One of the most well-known climbing peaks in Nepal that is higher than 6,000 meters is Lobuche East Peak. The Lobuche Peak Climb Expedition Itinerary takes you through the Khumbu Valley, up to Everest Base Camp, and then gradually up to Lobuche East Peak. Additionally, this mountain helps Everest summit teams prepare for their ultimate ascent by serving as a crucial training ground. The Technical Aspects of the Lobuche Peak Climb: Lobuche East Peak is classified as PD alpine, meaning that it has complex glaciers and aspects of technical climbing. Those wanting to go on this trip should have a basic understanding of mountaineering, including rock scrambling and ice/snow navigating with crampons and an ice axe. It is strongly recommended that participants take basic snow or alpine courses that include the use of crampons and an ice axe, as these are the essential technical requirements for the summit push. Although there will be a training day included in the itinerary, its main goal is to brush up on previous knowledge.

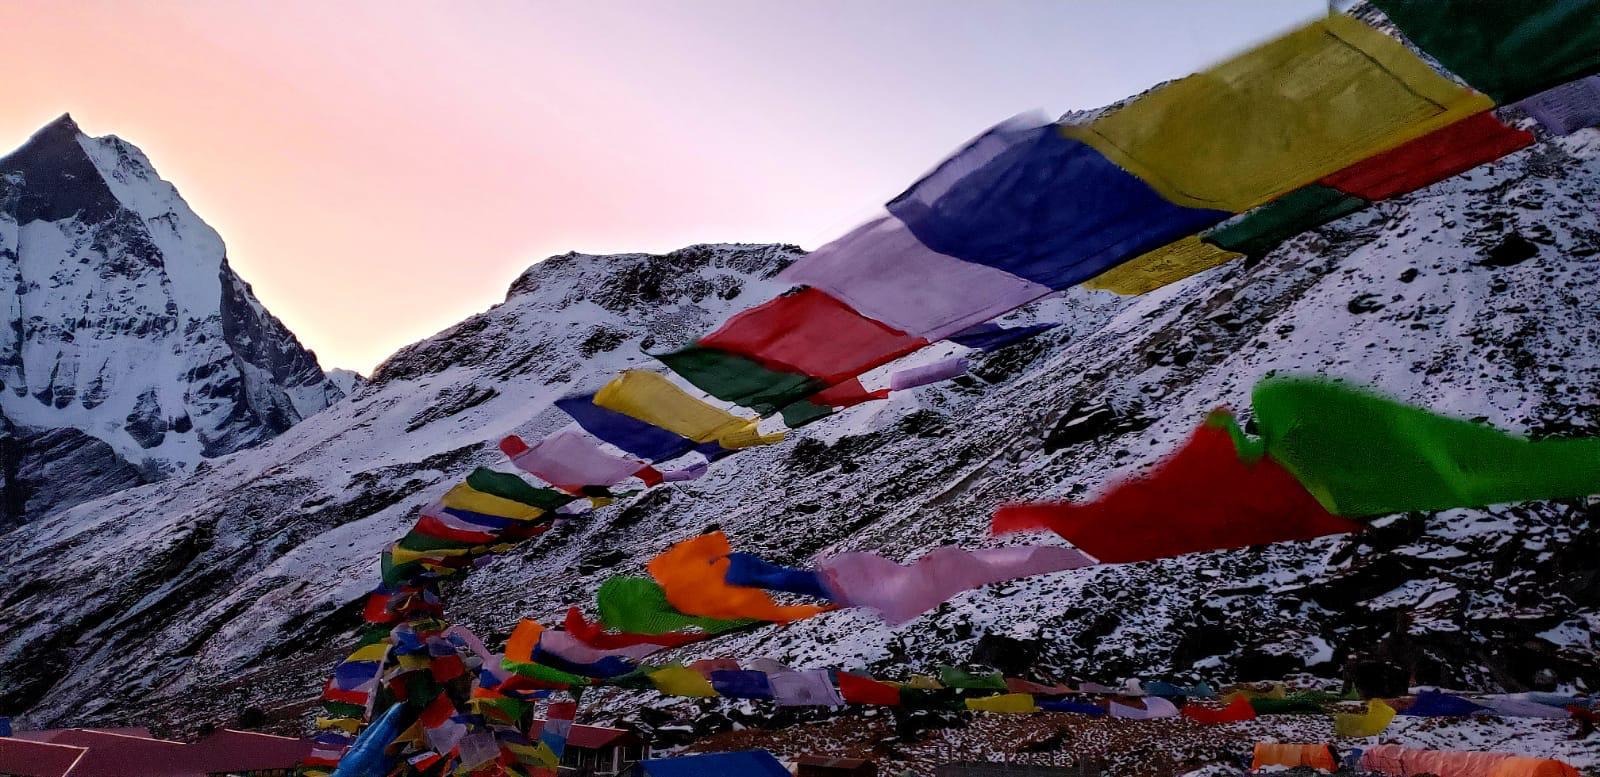
With an Alpine difficulty grade of 2B, Nepal’s tall and much sought-after summit, Lobuche Peak, welcomes travelers. This demanding expedition adheres to a well-planned schedule that guarantees a steady climb to the summit. Explore the stunning Khumbu Valley, go to Everest Base Camp, and then reach the top of Lobuche East Peak.

Mountaineering experience is essential for individuals who are seeking a thrill because of the challenging glacier climbing. It’s necessary to have prior climbing experience to try Lobuche Peak. Set off on an adventure of a lifetime and create an experience that you will never forget.

East-West Comparative Analysis

Lobuche East and Lobuche West are the two separate peaks of Lobuche Peak, which is situated in Nepal’s Khumbu area. Each summit has different difficulties and experiences. To assist you in choosing, consider this thorough comparison:

East Lobuche (6,119m)

Lobuche East is a more accessible and popular mountain than the West, with fewer technical difficulties and a higher climbing frequency. Climbers who want to experience high-altitude trips frequently choose it.
Climbing Route: Over a few brief tricky portions, there is a moderate climb that is often done with fixed ropes. A base camp at roughly 4,950 meters and a high camp at about 5,400 meters are common destinations for the trek.
Awe-inspiring panoramic views of Everest, Lhotse, Nuptse, Ama Dablam, and Pumori can be seen from the top.
Regulation and Permits: Being a “trekking peak,” it needs a Nepal Mountaineering Association permit, which is less costly and simpler to get than one for Lobuche West.

West Lobuche (6,145m)

Popularity and Accessibility: Because Lobuche West requires special permission and is more difficult to get, it is less frequently visited. Experienced climbers looking for a more challenging and less popular route will find it appealing.
Climbing Route: Technically more difficult, the ascent calls for expert mountaineering abilities. It features a strong, exposed ridge that leads to the top, as well as severe snow/ice slopes.
Features of the Summit: Reaching the top of Lobuche West gives you a sense of accomplishment and seclusion while offering a somewhat different but no less breathtaking view of the Himalayas.
Permits & Regulations: Climbing Lobuche West is a more costly and regulated activity that needs special expedition permission from the Department of Tourism.

Important Things to Take Into Account When Deciding Between East and West Skill Levels:

Climbers with intermediate experience should choose the East, while those with greater experience should choose the West.
Desired Challenge: While the West offers a more difficult and technical challenge, the East offers a challenging yet achievable goal for climbers with less expertise.
Cost and Logistics: In general, climbing the East Peak is less expensive and requires less logistical preparations.
Climbing Objectives: Think about your climbing objectives, such as mastering the technical difficulties of the West or obtaining high-altitude experience in the East.

Acclimatization and Altitude Sickness

One of the biggest worries and difficulties that climbers have when ascending Lobuche Peak is the possibility of altitude sickness, commonly referred to as acute mountain sickness (AMS).

Knowledge of Altitude Sickness

Altitude sickness: What is it? The decreased oxygen levels at high elevations cause altitude sickness. Anybody may be impacted by it, regardless of expertise or degree of fitness.
Symptoms: Headache, nausea, lightheadedness, exhaustion, dyspnea, and trouble sleeping are among the symptoms. Early symptom recognition is essential for prompt action.

Acclimatization Techniques

Gradual Ascent: We plan our routes to give you enough time to acclimate and a gradual ascent. Climb high, sleep low is what this entails.

Rest Days: Including rest days in places like Dingboche and Namche Bazaar allows your body to adjust to the higher elevations.

Hydration: In high altitudes, we highly recommend you keep yourself hydrated since dehydration can worsen AMS symptoms.

Steer clear of alcohol and tobacco: These two habits might hinder your body’s capacity to acclimate and raise the risk of dehydration.

Before the Climb: Preparation

Physical Fitness: Being in good physical shape can help your body better withstand the strains of high altitude, but it cannot entirely eradicate the risk of altitude sickness.

Pre-Climb Acclimatization: Your body will start to acclimate if you spend a few days at a higher altitude before the climb.

Frequent Health Checks: To keep an eye on our client’s general well-being and oxygen saturation, our guides conduct routine health checks.

Adaptable Itineraries: We are always ready to change our plans to meet the requirements of our clients for acclimation.

Guidelines for Fitness and Training

In addition to determination and strength of mind, climbing Lobuche Peak successfully demands on a high degree of physical fitness. We understand how crucial it is to be well-trained and prepared for an adventure at such a high altitude. These are our recommendations for fitness and training to help you get ready for this amazing journey.

Cardiovascular Endurance:

Climbing and trekking at high altitudes requires good cardiovascular health. It makes your body function more effectively in lower oxygen situations.
Methods of Training: Take up aerobic exercises like hiking, cycling, swimming, or jogging. Increase the time and intensity of these workouts gradually.

Strength Training: 

For climbers, leg and upper body strength as well as core strength are crucial.
Exercises: Incorporate pull-ups, push-ups, squats, lunges, and weight training into your fitness regimen. Additionally essential are core exercises like planks and stomach workouts.

Practice for High-Altitude Training Hikes:

To accustom your body to walking uphill and downhill, try to work on hills or mountains. This aids in your comprehension of how your body responds to increased elevations as well.
Use of Stair Climber: Using a stair climber machine may help you develop your strength and endurance.

Flexibility and Stability

Stretching and yoga: Practicing yoga or stretching regularly increases flexibility, which can help ward off injuries while climbing.

Practice Your Balance: When navigating rough terrain, balance is essential. Exercises with a balancing board or one-legged standing might be beneficial.

Mental Readiness

Stress management: Climbing at high altitudes can provide both physical and emotional challenges. Mental readiness can be enhanced by methods like breathing exercises and meditation.

Visualization: Envision the ascent and mentally get ready for whatever obstacles you may encounter.

Training Simulation

Bring a weighted backpack: To replicate the weight you will be carrying on the real climb, bring a weighted rucksack with you on your training treks.
Altitude Masks: Although they are debatable, some climbers imitate lower oxygen levels by using altitude masks.

Consumption and Drinking Water

A well-balanced diet should consist of a good balance of proteins, carbs, and healthy fats. Energy and general health depend on a healthy diet.

Hydration: Make a habit of staying hydrated when working out. It’s critical to comprehend your body’s hydration requirements when in high altitudes.

Rest and Recovery

Sufficient Rest: Give your body enough time to recover in between workouts. Injuries can result from overtraining.

Sleep: You should make sure you receive adequate sleep because it is essential to the body’s process of recovery.

Checklist for Gear and Equipment

Having the proper gear and equipment is essential for a successful ascent of Lobuche Peak. To make sure climbers are ready for the many obstacles of high-altitude climbing, Here’s a comprehensive list of everything you’ll need:

Essential Equipment for Climbing

  • Harness: An adjustable harness that goes over all of your layers of gear is called a climbing harness.
  • Crampons: Make sure your crampons fit well with your boots.
  • Mountaineering Boots: boots that are waterproof, insulated, and fit with crampons.
  • Ice Axe: For self-arrest methods and climbing.
  • Helmet: A helmet is essential for protection against flying debris.
  • Ascender and Descender: Like a figure-eight or Jumar and ATC Guide.
  • Carabiner: A combination of non-locking and screw-gate lockable carabiners.
  • Ropes: Fixed ropes as needed and dynamic climbing ropes.
  • Prusik Loops/Sling: For rope ascents and crevasse rescue.

Clothing

  • Base Layers of Clothing: Thermal shirts and bottoms that wick away moisture.
  • Layers of insulation: coats and pants made of fleece or synthetic down.
  • Both the outer shell jacket and pants are breathable and waterproof.
  • An excellent down jacket for really cold temperatures.
  • Lightweight, insulating, and waterproof gloves and mittens.
  • Hats: A cozy beanie and a sun hat.
  • For facial protection against the sun and cold, use a buff or neck gaiter.
  • Socks: liner socks and wool or synthetic socks.

Personal Gear

  • Backpack: A bigger duffel bag for transferring equipment, together with a 40–50 liter climbing pack.
  • Sleeping Bag: Minimum temperature rating of -20°C (-4°F).
  • Strong lumens in the headlamp and batteries allow for overnight climbing
  • Glacier glasses with UV protection for sun protection.
  • Goggles: In situations with strong winds and snow.
  • Trekking poles: robust and adjustable.
  • Hydration systems or water bottles should be insulated to avoid freezing.
  • Lip balm and sunscreen with high SPF and UV protection.

Extra Equipment and Accessories

  • Personal medicine and basic first-aid kit.
  • Use a power bank or additional batteries for your smartphone or camera.
  • Compass/GPS and maps: As backup navigational aids.
  • Personal hygiene products such as biodegradable soap, toothbrushes, and towels.
  • Energy bars and snacks: To replenish energy quickly when climbing.
  • Tablets or other devices for water purification: To guarantee clean drinking water.

Remember that this is only a list of recommendations; your gear needs could vary depending on the time of year, your route, and your particular preferences. For those who want specific equipment, rental choices are available, and we can offer extra insights and advice on gear selection. Having the proper equipment and being well-prepared are essential for a successful and pleasurable ascent of Lobuche Peak.

Climbing Permits and Regulations

In order to climb Lobuche Peak in Nepal, one must comply with several regulatory restrictions and secure the necessary permits. We facilitate the easy obtaining of the required paperwork. An outline of the necessary permissions and legal concerns for climbing Lobuche Peak may be found here:

Permits Required for Climbing

Nepal Mountaineering Association(NMA) permission: Since Lobuche Peak is considered a “Trekking Peak,” NMA permission is needed.

Sagarmatha National Park Permit: Since Lobuche Peak is located inside the park, permission is required to enter it. The preservation of the park’s natural and cultural values depends on this authorization.

Khumbu Rural Municipality Permit: The Khumbu Rural Municipality Permit is available to foreign people, including inhabitants of SAARC (India, Bhutan, Bangladesh, Sri Lanka, Maldives, and Pakistan), for NPR 2,000 per person for the first four weeks of the permit.

The best season and the weather

Choosing the ideal season and being aware of the weather is essential to organizing a successful ascent of Lobuche Peak. The weather in the Himalayas is extremely unpredictable, which may seriously hinder a climbing adventure.

Weather Variable and Unpredictable: The Himalayan region experiences abrupt weather changes, with notable variations in conditions at different elevations.

Temperature: There is a large variety of temperatures. While it might be warm and bright throughout the day, temperatures can drop below freezing at higher altitudes, particularly at night.

Wind and precipitation: Strong winds and unexpected snowfall are common on Lobuche Peak’s upper elevations, which can cause challenging climbing conditions.

Best Time of Year to Go Climbing:

April through May, pre-monsoon (spring) One of the greatest times to climb Lobuche Peak is right now. With warmer temps and clearer skies, the weather is rather steady. The region’s vegetation is also brought to life in the spring, adding to the beautiful rewards of the treks to base camp.

Post-Monsoon (Autumn): October to November: The months after the monsoon season are also ideal for climbing. There is very little precipitation, calm weather, and good visibility. The days are clear and sunny, but the nights are chilly.

Off-Season

Winter: December to February: Because of the extremely low temperatures and an abundance of snow, winter climbing is more difficult and technically demanding.

June through September is the monsoon season. Because of strong winds, the possibility of landslides, and low visibility, this time of year is best avoided. To have a more alone experience, some climbers choose to go during this season.

Exit mobile version